If your PC isn’t detecting an external hard drive, use this guide to resolve the issue. Sometimes, for unknown reasons that could be related to your connection, driver, settings, or hardware issues, Windows 10 will just refuse to detect the external drive, or it’ll detect the device, but it won’t appear in File Explorer.
If you’re trying to set up a new external hard drive, or you want to use a storage device previously connected to another computer, but it won’t show up, there are a number of troubleshooting steps you can follow to resolve most common problems.
FIX External Drive Not Recognized Or Showing Up
Preliminary Step: Your Drive Powers On
This is a preliminary step, but one worth checking. Nearly every flash drive and many external hard drives don’t require a separate power source—they receive power over USB. However, some desktop external drives do have dedicated power cables, or at least a physical power switch.
If this is the case for you and your external hard drive is not showing up, you could have an issue with the power cable. Try plugging it into another power outlet, or swap the cable if possible. Check for flashing lights on the unit that indicate activity before moving on.
Fix Error #1: Fixing drive letter
If you know that the drive is working correctly, but it won’t show up in File Explorer, the drive could be trying to use a letter already in use by another device or the drive letter may be missing.
A drive letter conflict is a common problem with removable devices, and you can fix this issue with these steps:
RESOLVING LETTER CONFLICT:
- Open Start.
- Search for Create and format hard disk partitions.
- Click on the top result to open Disk Management.
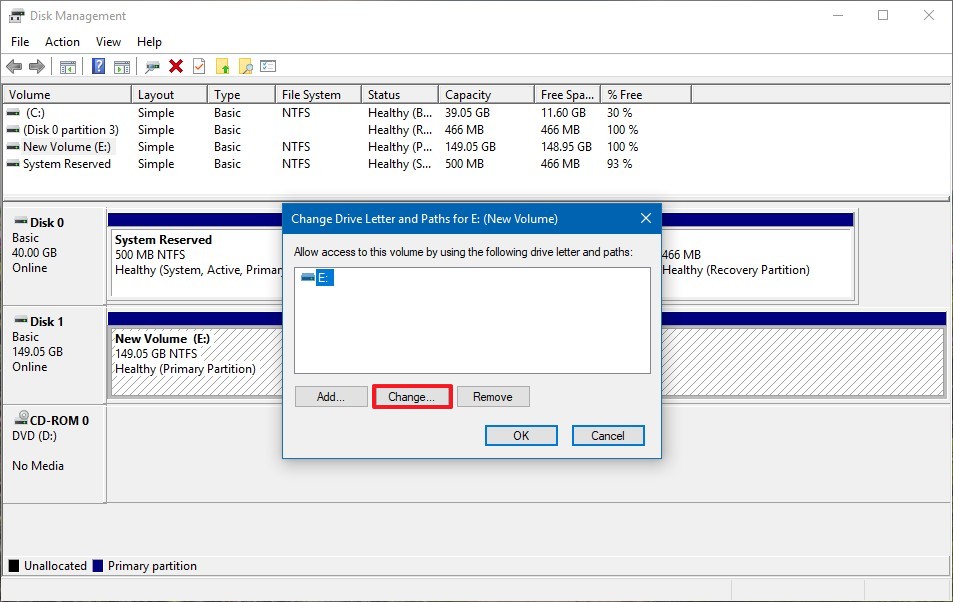
- If the drive is trying to use an existing drive letter, right-click the volume and select the Change Drive Letter and Paths option.
- Click the Change button.
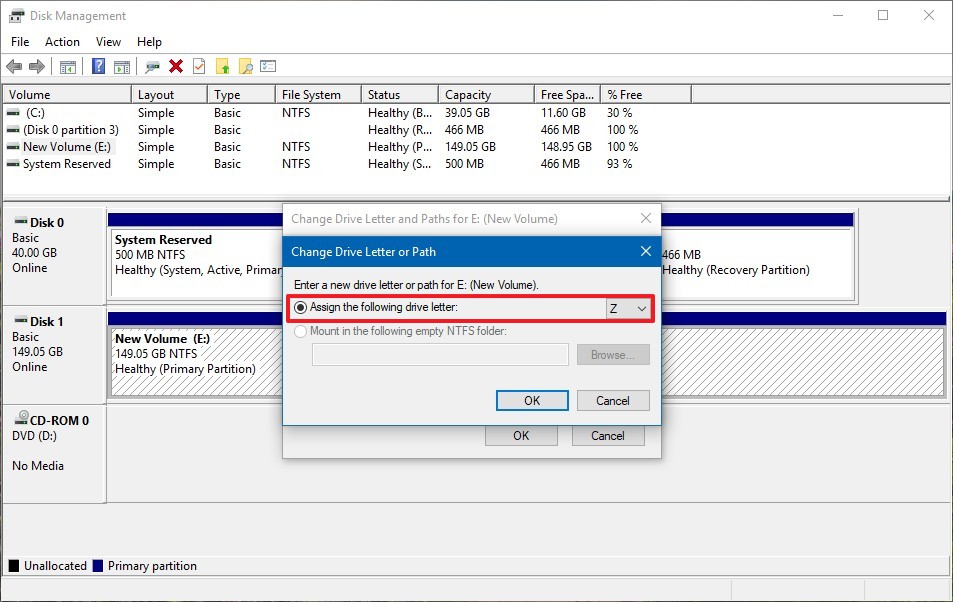
- Select the Assign the following drive letter option.
- Use the drop-down menu from the right and select any of the available letters.Quick Tip: When assigning a drive letter manually, it’s good practice to use the last letter available to avoid future conflicts with automatic assignments.
- Click the OK button.
- If you receive a warning message, click the Yes button.
Immediately after assigning the new letter the external drive should appear in File Explorer.
RESOLVING LETTER MISSING:
Unless you’re mounting the drive as a folder, it’ll require a letter to be accessible from File Explorer. If the letter is missing from the drive, you can assign a new one using these steps:
- Open Start.
- Search for Create and format hard disk partitions.
- Click on the top result to open Disk Management.
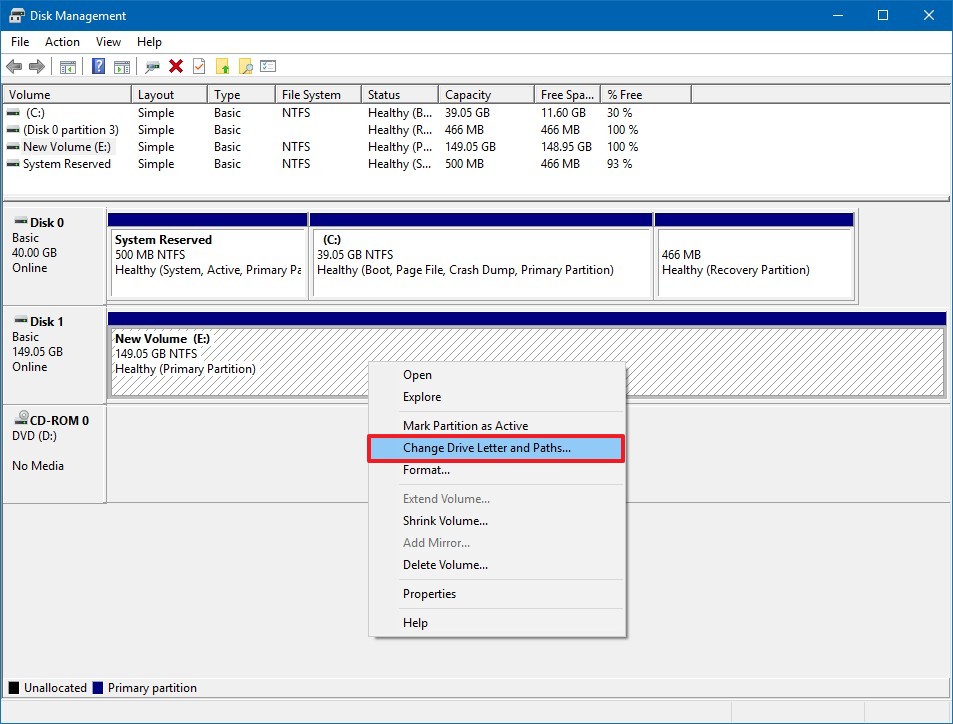
- If the drive doesn’t have a drive letter next to the name, right-click the volume and select the Change Drive Letter and Paths option.
- Click the Add button.
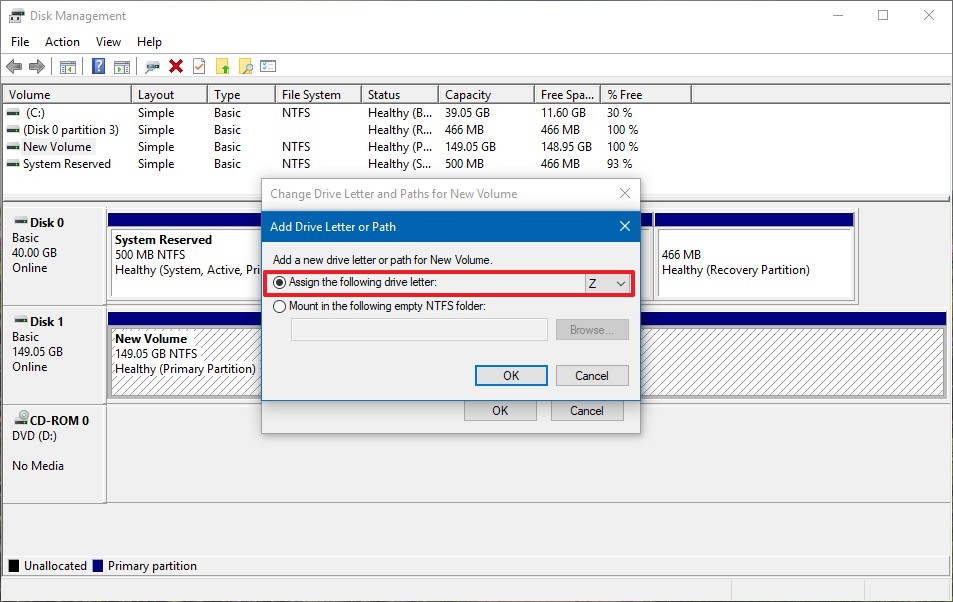
- Select the Assign the following drive letter option.
- Use the drop-down menu from the right and select any of the available letters.
- Click the OK button.
After completing these steps, the storage should be accessible in File Explorer.
Fix Error #2: Create a New Drive Volume
If your removable drive shows only Unallocated space, you’ll need to create a new partition on it. This allows Windows and other operating systems to use it. To do so, right-click anywhere on the Unallocated space, select New Simple Volume, and go through the wizard to create a new partition.
If your drive is partitioned (meaning it doesn’t have Unallocated space) and you still can’t see it, ensure it has a drive letter set. This should happen automatically, but if you’ve manually removed the drive letter, the drive may not be accessible in Windows.
To change the drive letter, right-click the removable drive’s partition and select Change Drive Letter and Paths. If the device doesn’t already have a letter, click Add and choose one. If it does, click Change and try another one.
Something later in the alphabet, like G or J, is standard for removable drives and will work fine.
Fix Error #3: Format Drive
Windows 10 only recognizes drives using a supported file system (NTFS, FAT32, exFAT, or ReFS). If you’re connecting a drive formatted using a different OS (macOS or Linux) with an unsupported file system, it won’t appear on your computer. In this case, the solution is to format the drive using a supported file system.
NOTE: Using this process will erase everything on the drive. If you have any data that you want to keep, make sure to connect it to a supported device, extract the data, and only then continue with the steps below.
To format a drive with a supported file system, use these steps:
- Open Start.
- Search for Create and format hard disk partitions.
- Click on the top result to open Disk Management.
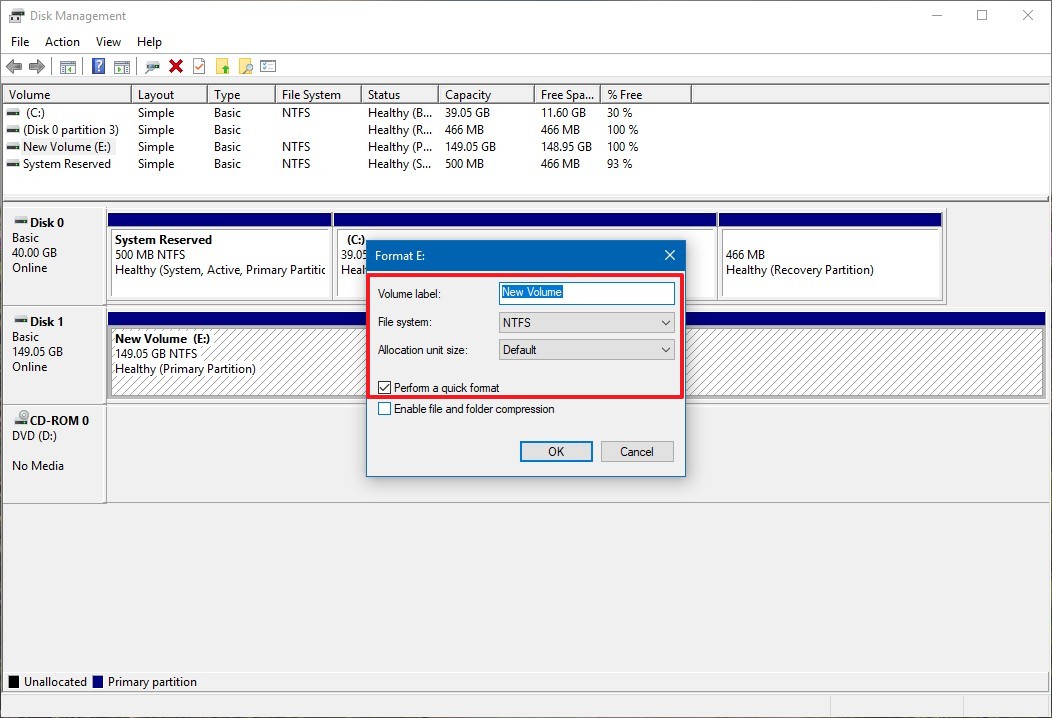
- Right-click the drive with the unsupported file system, and select the Format option.
- Under “Volume label,” select a name for the drive.
- Use the default settings, including:
- File system — NTFS.
- Allocation unit size — Default.
- Check the Perform a quick format option.
- Click the OK button.
After completing these steps, the drive will be formatted with a supported file system, and it should be available through File Explorer.
Fix Error #4: Fixing drive not initialized
Sometimes, when connecting an external drive that has never been initialized and formatted, or you’re using it on another computer, Windows 10 may not detect the drive correctly. Also, it’ll show up in Disk Management as “Unknown” and “Not Initialized.” Typically, this problem will happen more often when installing an internal hard drive originally from another computer, but it can happen to portable hard drives.
If this is the case, you can quickly initialize the drive using these steps:
- Open Start.
- Search for Create and format hard disk partitions.
- Click on the top result to open Disk Management.
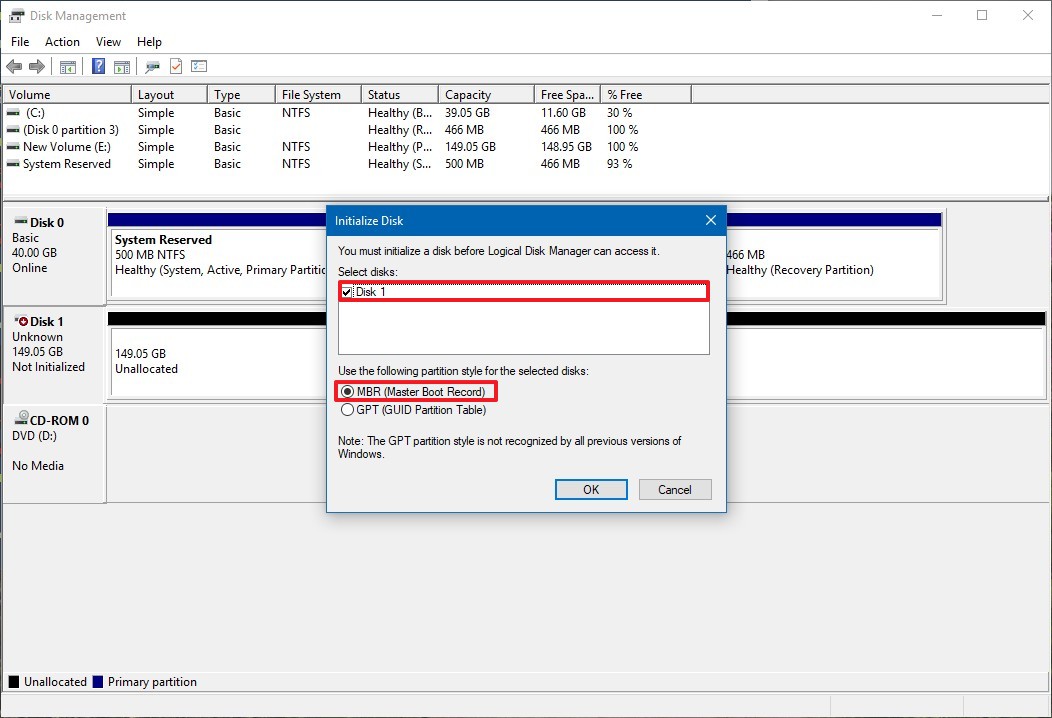
- If the drive appears “Unknown” and “Not Initialized,” right-click it, and select the Initialize Disk option.
- Select the drive (if it’s not already selected).
- Select the MBR (Master Boot Record) option.
- Click the OK button.
Fix Error #5: Troubleshoot Driver Issues
If the drive does show up on other computers—or you don’t have another computer around to check—Windows may have a driver problem with your device. You can check for this using the Device Manager.
- You’ll find a shortcut to the Device Manager under the same Windows + X menu mentioned earlier. You can also enter devmgmt.msc into the Run dialog to open it.
- Expand the Disk drives category and check for any devices with a yellow exclamation point next to them. If you see a this symbol, that device has a driver problem.
- Right-click the device with the issue, select Properties, and look at the error message. This error message can help you fix the problem; you may want to perform a Errofix Search for the error message you find.
If this doesn’t work, you can try the Update Driver button to install an updated driver. However, this rarely finds a new driver for generic devices like flash drives. Instead, you may want to check the manufacturer’s website for a specific driver for your external hard drive.
Leave A Comment?